 Are you looking for affordable, eco-friendly solutions for everyday cleaning? Maybe you'd like to involve your children in family cleaning, but you don't feel comfortable with the products you are using? I'm with you. Having my kiddos made me take much more pause before grabbing a cleaner off the store shelf and toting it home to use. But, I also need convenience. Anything I make has to be quick and easy. And, I confess, I do love the convenience of any kind of wipes - no spraying or soaping - just open and go. Today, I'm sharing with you a super simple cleaning recipe I've used for several years. While it takes a few minutes to make, the end result is easy-peasy like those store-bought wipes. But, with confidence in the ingredients and a reusable wipe - woohoo! Supplies Needed:
-washcloths or rags (I use about 12 washcloths for this recipe myself - you may like more or less depending on how damp you'd like them to be.) - container that will hold your rags + solution - 1 c. distilled water (or water you've boiled for 10 minutes) - 1 c. white vinegar - 2 TB vodka (While some add essential oils to these types of recipes, I'm pretty cautious with any EO usage because of babes/toddlers/kids/pets.) To make: Combine all ingredients in the bottom of whatever container will fit your rags. (I use a container I saved from the recycling.) Roll cloth wipes and stand upright in solution. Close lid and give a little shake. The cloth wipes will naturally soak up the solution and be damp when you pull one out to use. To use: Open container and pull out wipe. Clean. Toss in laundry. When container is empty, it is time to make another batch! While I can imagine these wipes fulfilling several jobs, they are our go to for wiping down bathroom sinks, counters, and the outside of toilet bowls. I've found that a deep clean may be expecting too much from my kiddos, but they are all capable of a daily wipe down. And, a daily wipe down to their standards is much better than waiting until I have the chance and need for a *deep* clean. Happy eco-baby living! Looking for other Eco Baby friendly recipes and projects? Check out all the Nested Mama Blogs on this topic here!
0 Comments
 Are you looking for more eco-friendly cleaning options? Do you love to DIY your own cleaning products? Looking for a inexpensive, kid-friendly alternative for toilet bowl cleaner? I'm so excited to share with you a simple, inexpensive recipe for to make cleaning your toilet a snap. In fact it is so simple, that you can involve your kiddos in making the cleaning product and the actual work of cleaning, too!
If you search on Pinterest you'll find lots of DIY cleaning recipes - I prefer mine to be as simple as possible and easy to scale the size up a batch up or down, so I drew on a few different recipes.
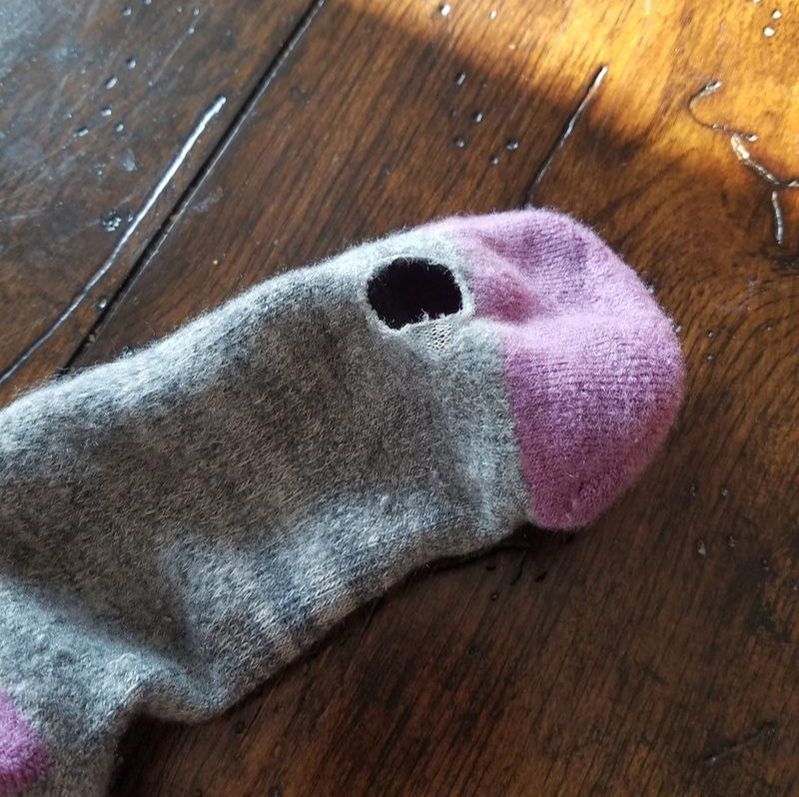
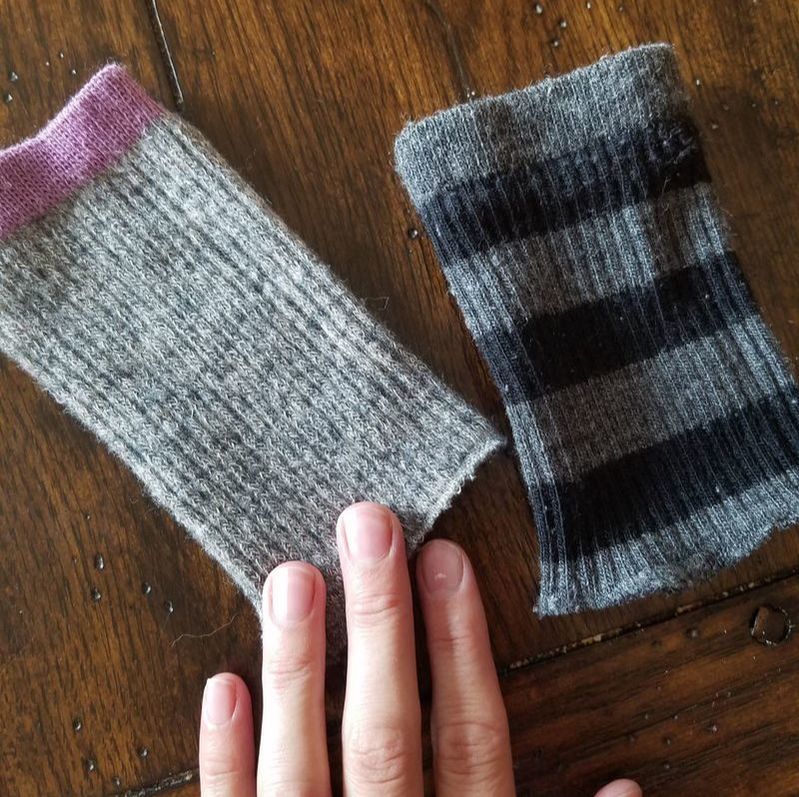
1.) Add the Citric Acid and Baking Soda to the bowl with a 1:1 ration and mix well. 2.) Mix in several drops of essential oils. Even though these tabs are going in the toilet and not on my children, I still choose to use those oils considered safe for children, with citrus varieties being my favorite options. The kiddos often help tossing the tab into the toilet or making them, so it is important to me that I feel comfortable with the ingredients. If you prefer unscented, skip this step. 3.) Slowly add a SMALL amount of water. Ideally use a spray bottle and slowly add a couple sprays at a time. You want the mixture wet enough to clump but not so wet as to lose all the citric acid fizz. (I confess to not having a spray bottle on hand when I made these . . . and I just add a few drops of water at a time.) 4.) When the mixture feels even, press into your chosen molds. Ice cube trays, mini muffin tins, jell-o molds, etc. all work just fine. The mixture will likely expand a bit as it dries, so leave a bit of extra space. 5.) When fully dry, remove from molds and store in an air tight container. 6.) Put a couple in your toilet as needed (pending the size of the molds) and let them fizz! Then use a toilet bowl brush to scrub as normal. Enjoy your clean and fresh toilet!  Things I love: - simple DIY - upcycling - staying warm - getting outside If what I just listed is your jam, too, I've got the perfect little upcycle/diy/keep you warm while you get outside project for you today! Woohoo! Let's start with a problem - my holey, well-loved wool socks. The moment the temperature starts to drop, I pull out wool socks for hiking, lounging, doula overnighting, and everyday-ing. The end result? A big 'ole hole right under the ball of my feet. While I could darn this sock, stitches under the ball of my feet just won't work for me. My solution? Upcycle these beloved wool socks into wrist and ankle warmers that help keep the whole family cozy when we adventure outdoors.
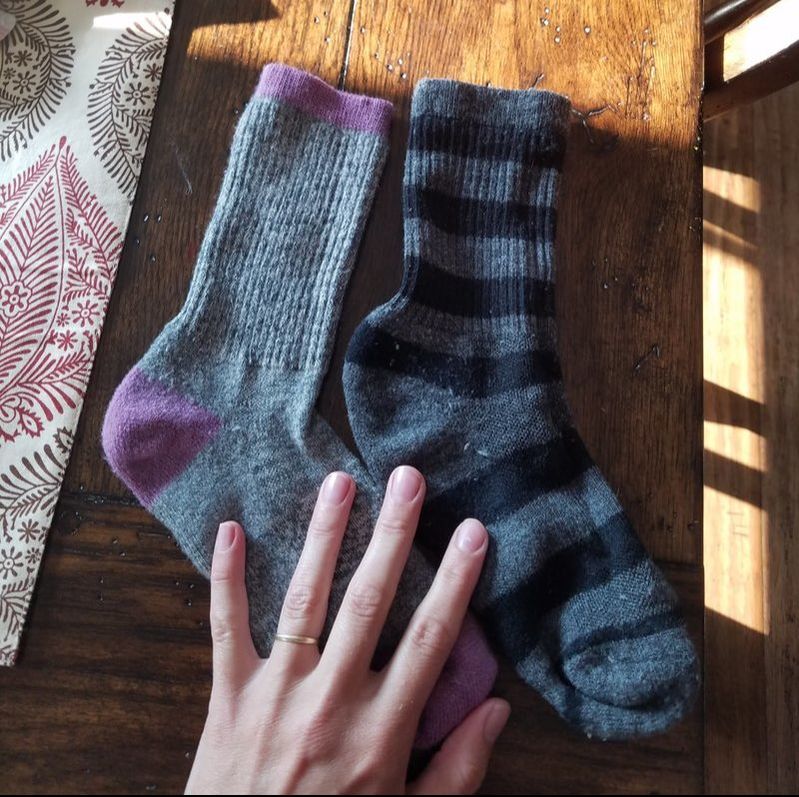
My directions are super simple - using scissors, cut the sock at the bottom of the cuff. If you are feeling fancy, you can finish it off with some stitching (a blanket stitch by hand or some machine stitching both work equally well). Because I'm often not fancy, I have a lot of holey socks, and I stash these in all kinds of places (car/diaper bag/hiking bag/mitten and hat bin/coat pockets), I leave them unfinished and, for us, they hold up just fine.
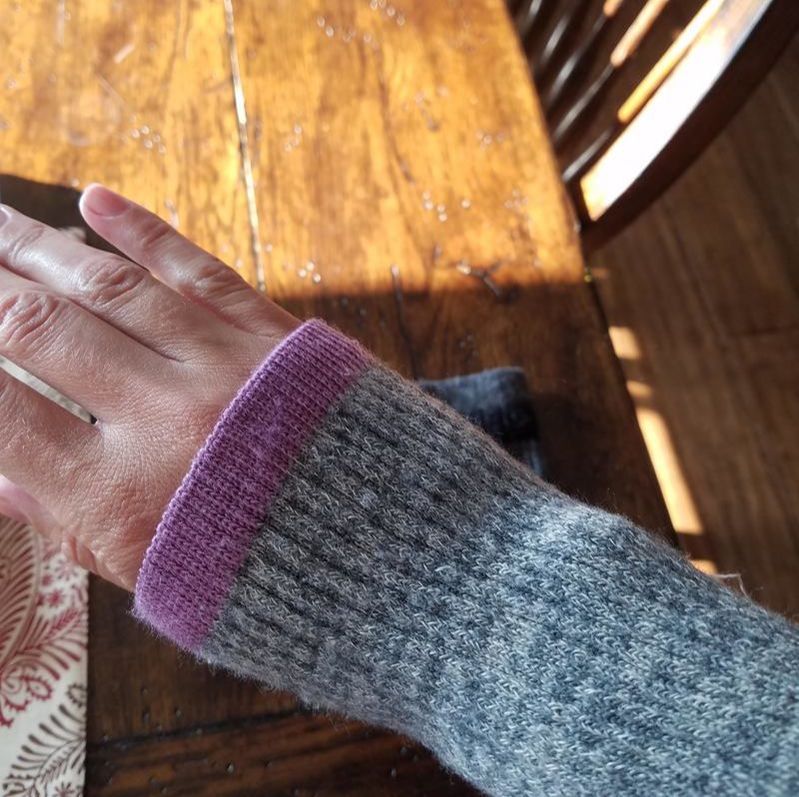
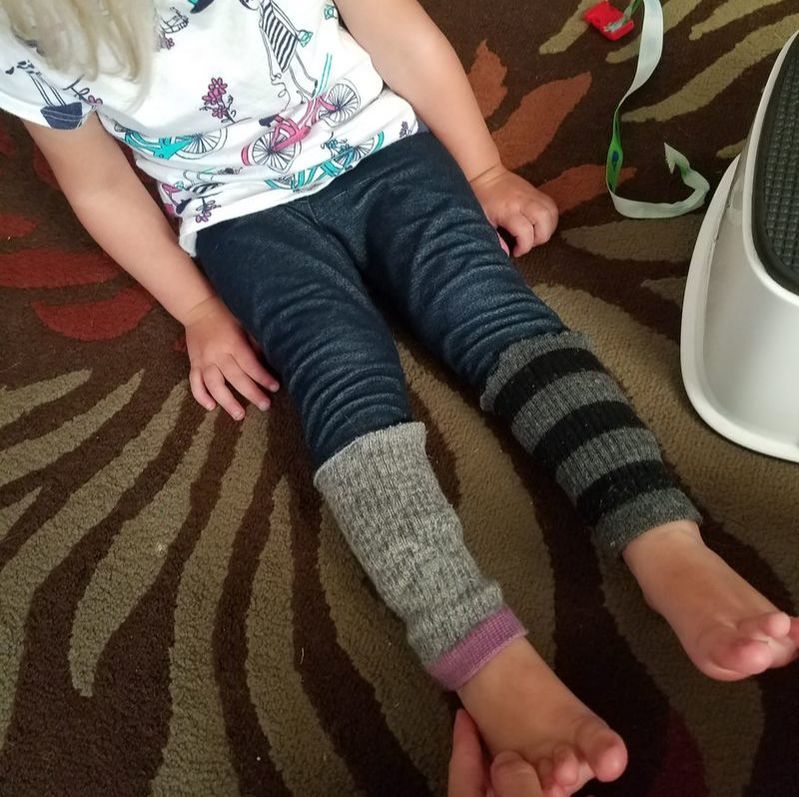
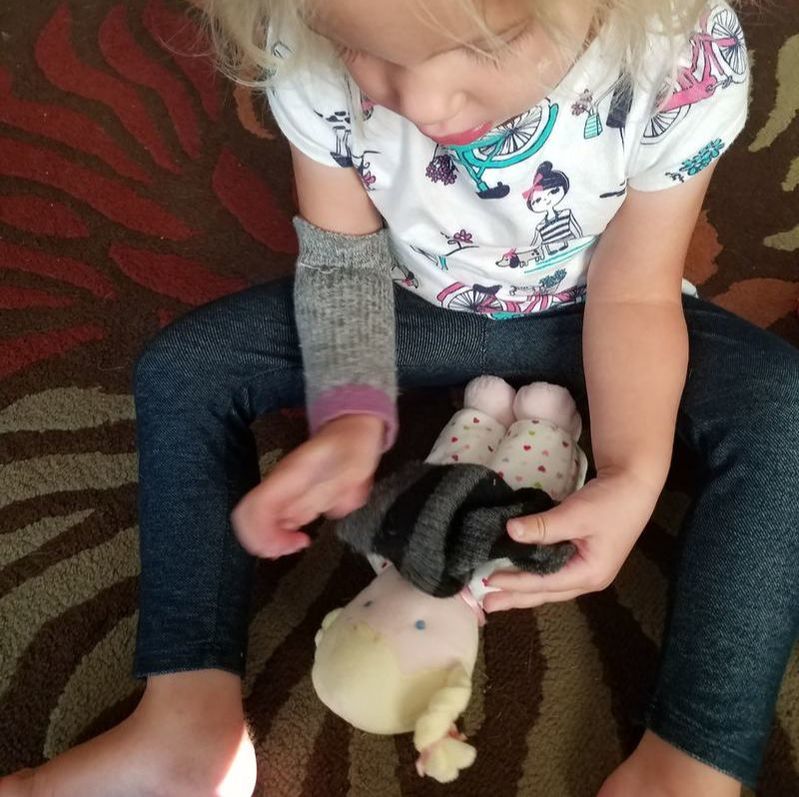
How we uses our upcycled wool goodness: - hand warmer - filling the gap between glove and coat - ankle warmer (cover that gap between sock and pant that happens when baby is on your hip or in the carrier!) - boot topper - knee covers for crawling babes - in a pinch, these have doubled for socks (albeit, toeless ones) when my kiddo's socks got soaked on a hike and dry socks were in the car
For us, troubleshooting cold hands and feet can mean the difference between enjoying our time outdoors or not. Having these little warmers in my pack can make certain we get our much-need time in the fresh air, even when chilly winds blow. Do you upcycle your wool? Share in the comments below how and what you do!  My kids are scientists - they learn by exploring. Everything. That hand soap over there? How many pumps can I fit in my hand? What does it feel like if I coat my hands and the sink in suds? How much rinsing does it take to get the bubbles off? My kids are artists - they create using any medium. Anything they can find. That bar of soap on the dish? Surely that was meant for sculpting, right? What does it look like when I break it into bits? Can I make something new of those pieces mixed with water? Because even a trip to the bathroom sink to wash hands after playing with chalk turns into a wondrous science experiment or artistic creation, I want to know exactly what is in my kids' hand soap. For me, making it myself offers just that option. That said, for me to make ANYTHING myself it needs to be quick and easy. Today, I’m sharing the simple DIY foaming hand soap recipe I use at all our sinks. In addition to being quick and simple to diy, this foaming hand soap makes it easy for little ones to work up a good lather. And, it is also extremely inexpensive, which means that when they decide to make foaming beards instead of washing hands, I don’t stress about wasted soap. 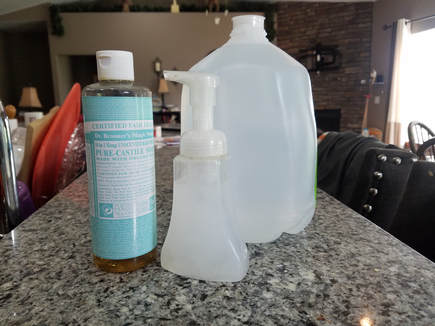 What you need: Distilled water (Or boil tap water for 10 min and then cool.) Dr. Bronner’s Liquid Castile Soap (You only need a tiny bit, so one bottle lasts me years.) Foaming bottle dispenser (If you have one from other soap, just give it a good rinse and fill it with your new diy version!) What you do:
Because I use this to wash baby and kid hands, I choose the unscented baby castile soap. If you prefer scents, Dr. Bronner’s has many varieties available. Did you try this DIY recipe? Share your thoughts below. Are you looking for more ways to make your home eco-friendly for baby? Check out Nested Mama’s Eco Baby Consultations.
Overwhelmed by all the choices when it comes to preparing your home for baby? Want to make decisions in line with your values and concerns but don't know where to start? I'm thrilled to share that I completed my EcoBaby Certification with Bebo Mia and Green at Home and now offer personalized consultations. We start with what matters most to you and make sure you have all the resources you need to make informed choices for your family. Want to learn more? Visit the Nested Mama site for more info, and check out the tips in the infographic below. 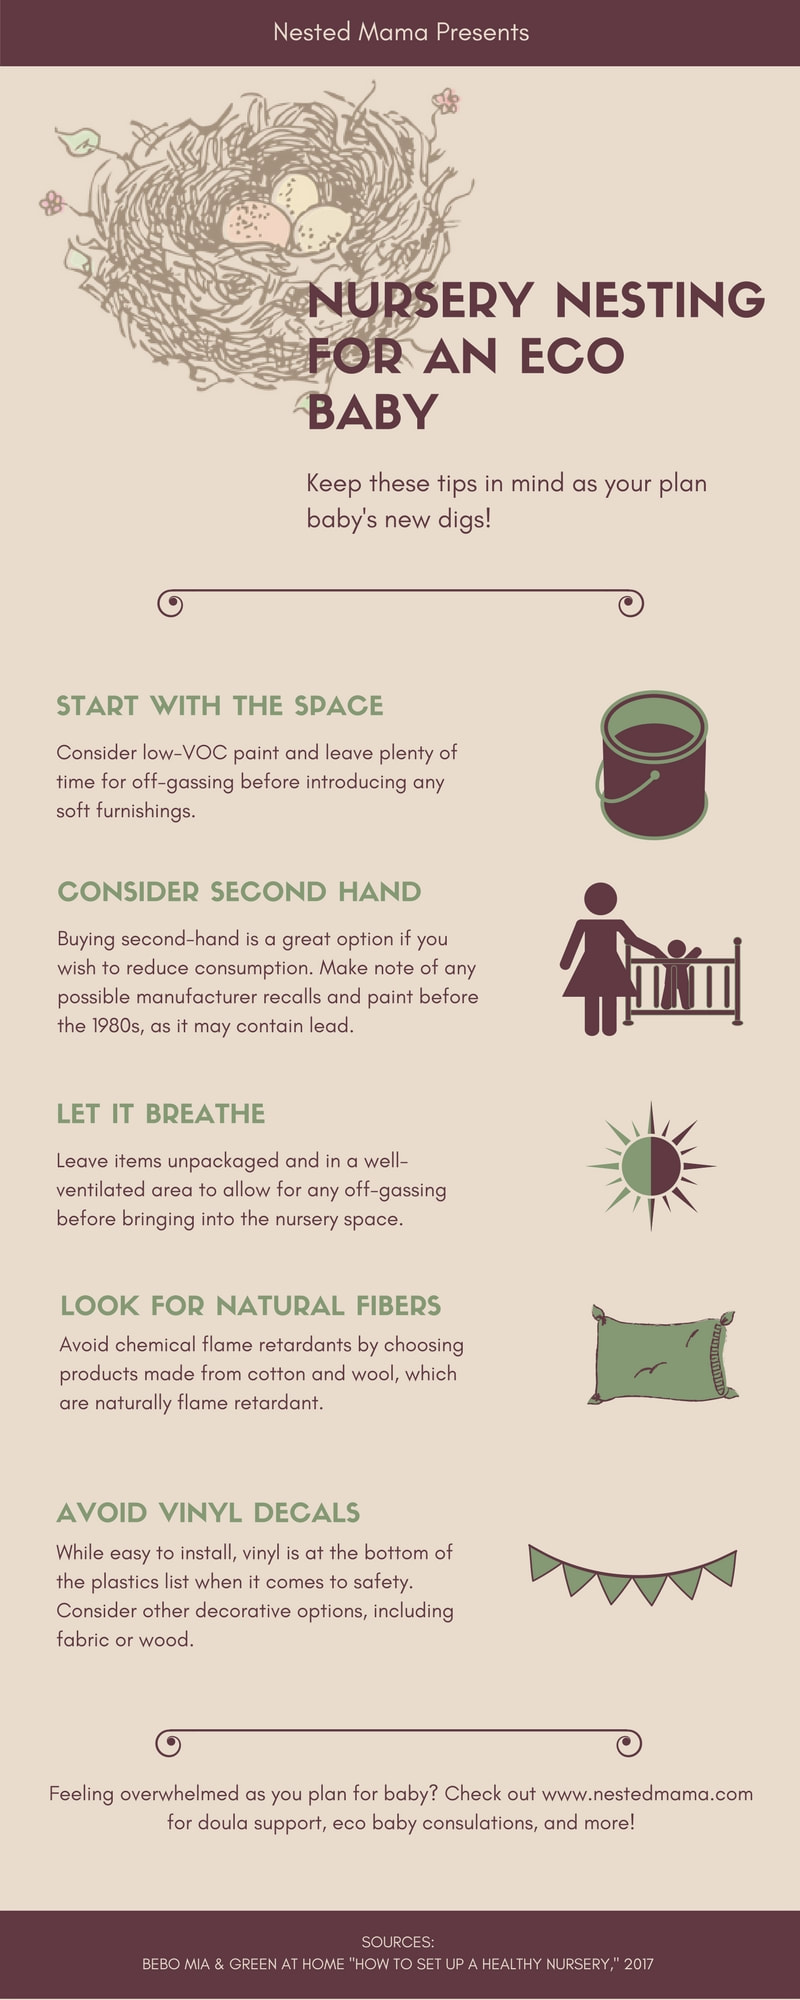 |
AuthorJohanna received a Ph.D. in English in 2014. Now a postpartum doula and educator of childbirth, breastfeeding, and infant sleep, she blogs about pregnancy, birth, postpartum, and parenting. 
Archives
February 2021
Categories
All
|

 RSS Feed
Serving Iowa City, Cedar Rapids, and surrounding Corridor communities
Copyright © 2018